What is a Dieline
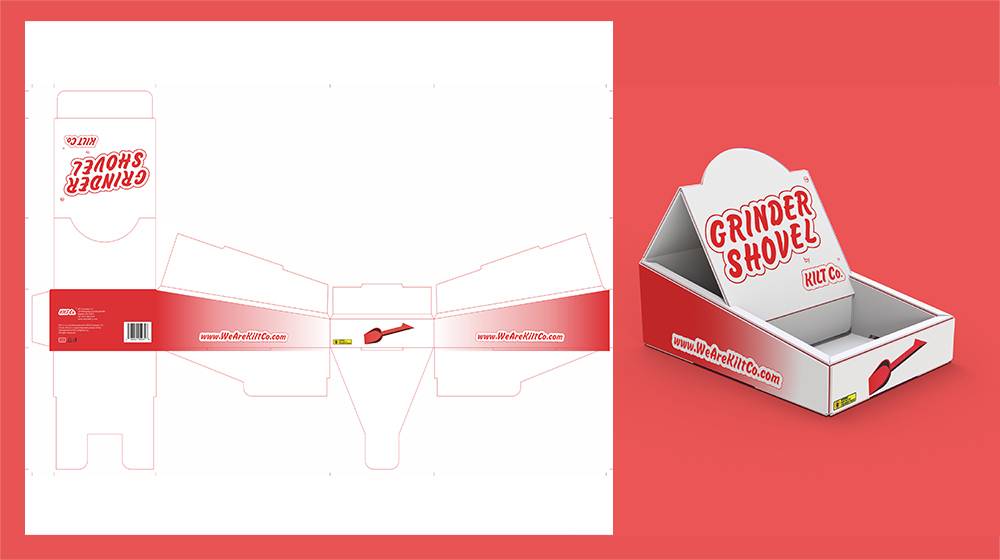
In packaging design, the template or layout on which you set your design refers to the dieline. Think of it as a diagram with guides that helps you take care of the folds and cuttings, ensuring that your logo and artwork is placed accurately in a flattened form. Die line plays a significant role in packaging design, as it the dieline that helps guide the machine where to cut or perforate the package.
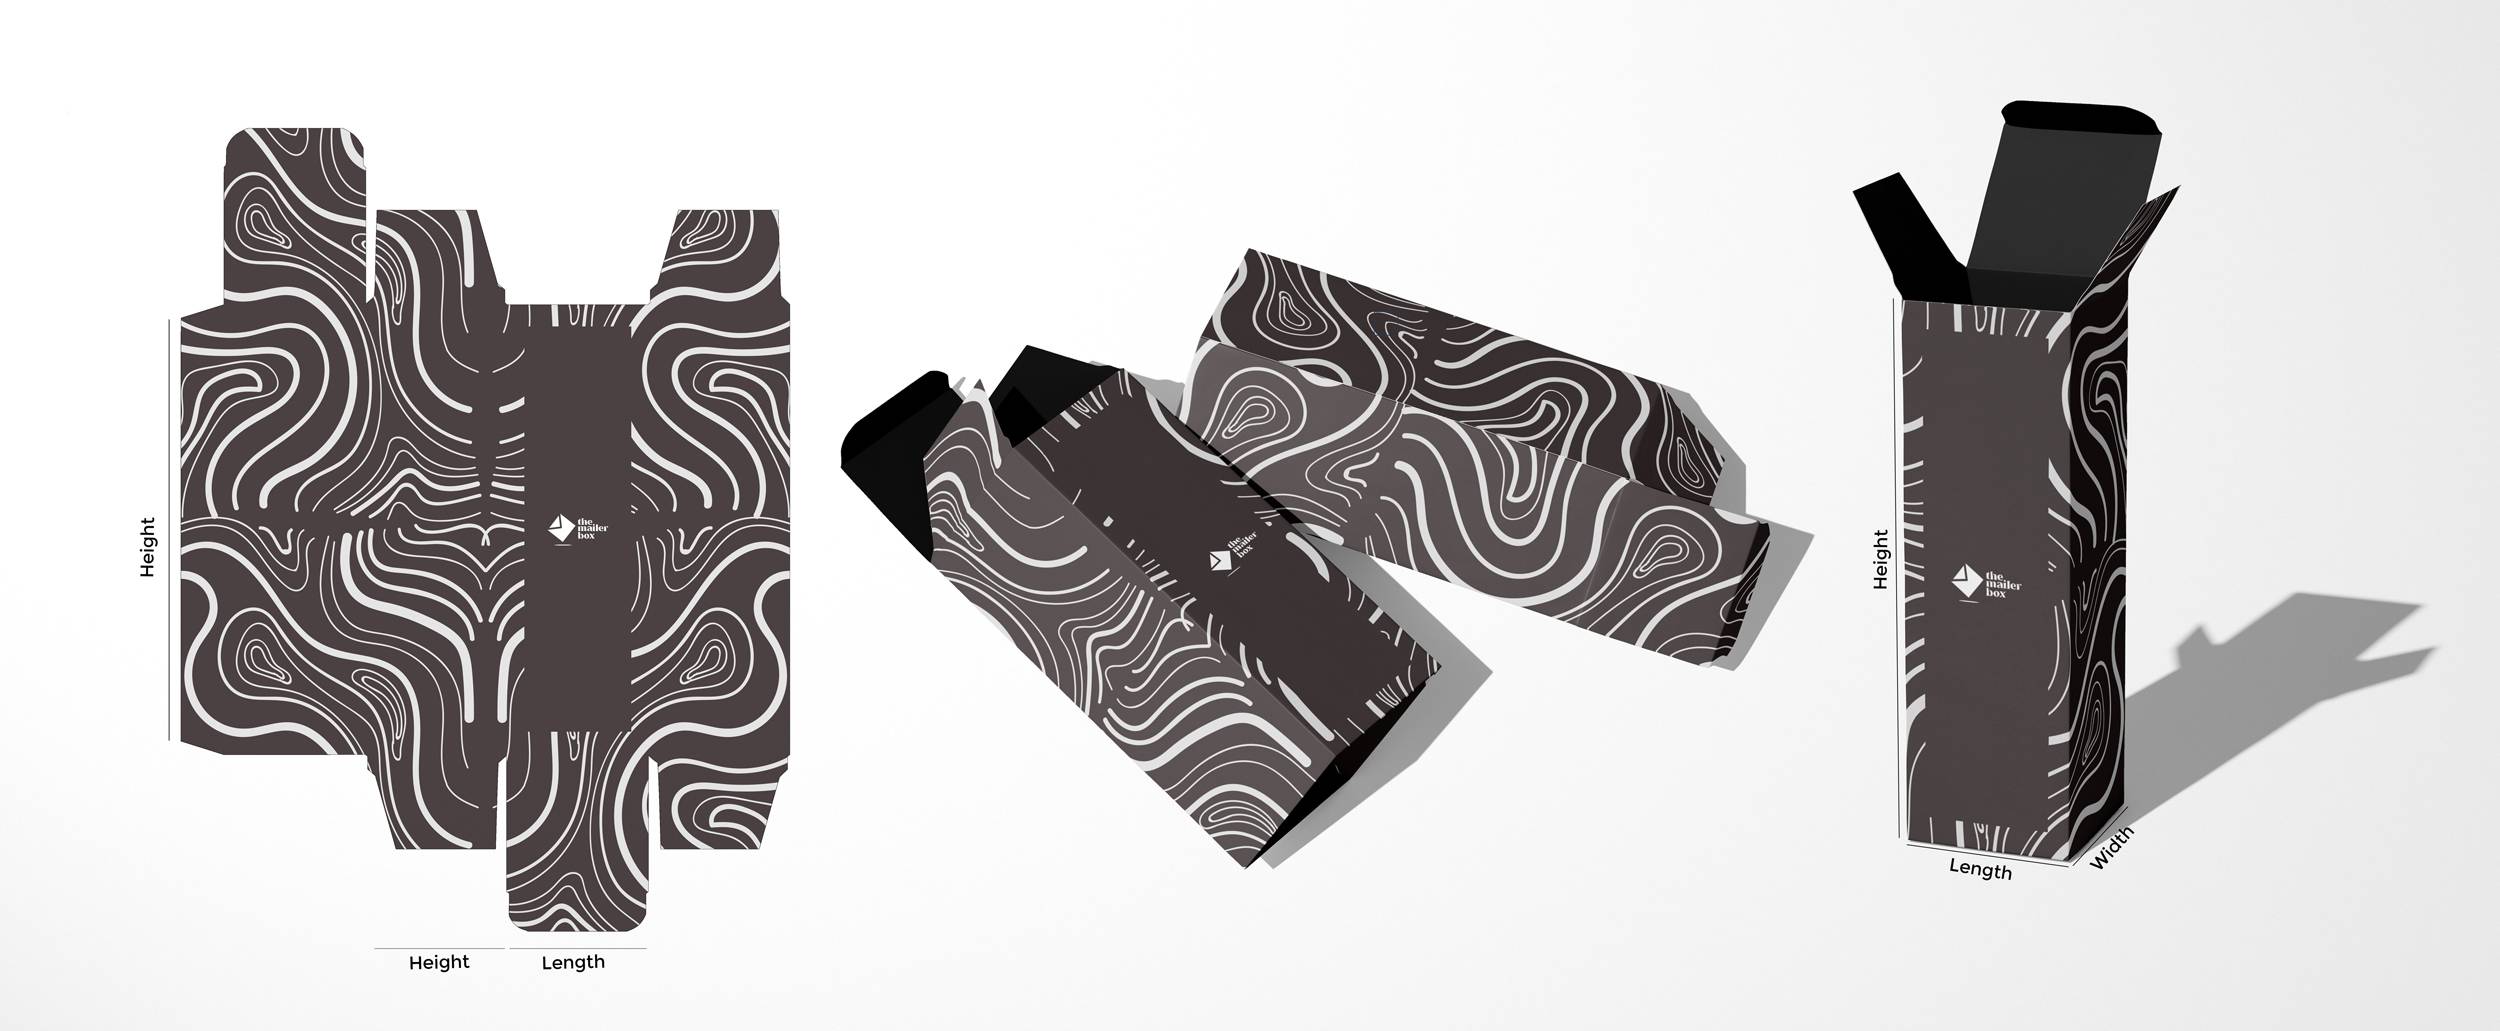
The three main components of a dieline consists of the fold line, where your carton or box may have the flaps and folded sides. The cut line, where the machine cuts it to the size required. And finally, the perforation line with small dotted holes. A die line design may also have bleed lines and margins to keep your artwork at a minimum of 0.125 inches away from the cut line. Each of these components of a dieline are designed in different colors to ensure the printer understands where to cut, fold and perforate.
Packaging companies are equipped with the resources and expertise to provide a company with an accurate dieline. Infact creating a dieline for your artwork is the first step to building a high-quality and well-designed custom packaging box. In certain instances, the company may send the manufacturer a sample product as a reference for packaging. In such cases the packaging manufacturer will have to start with taking the dimensions of the product to determine the measurements of the box, and then create a dieline for the design and print.
Why is Dieline Important?
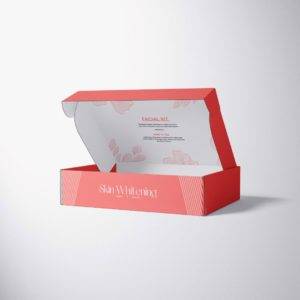
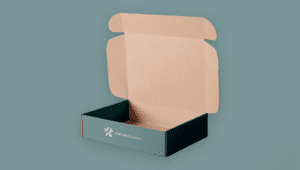
Dieline is the first step to an effectively designed packaging box. It ensures that the design, production and manufacturing experience is a seamless one. As a blueprint for the design, the dieline’s layout can aid you in creating accurate digital mockups, a printed package with no errors and creating an unboxing experience that is unlike any other. With a dieline you can visualize each and every side of the package in flattened form.
To summarize, a dieline is essential to ensure:
- Accurate package dimensions and artwork placement
- Accurate positioning of cutting and creasing lines, folds, and glue tabs.
- Avoiding cutting the design and logo with proper bleed lines.
After the dieline is set, the packaging experts and designers can correctly visualize how the package will look in print. If you are a new to the field of packaging and design, you can grab a box of tissue, unfold and lay it flat to observe how it has been and cut and folded. It will help you visualize how each element of the design is balanced and aligned.
It is important to note that dielines are not only used to design packaging boxes, but also for product printing.
Understanding the “Lines”
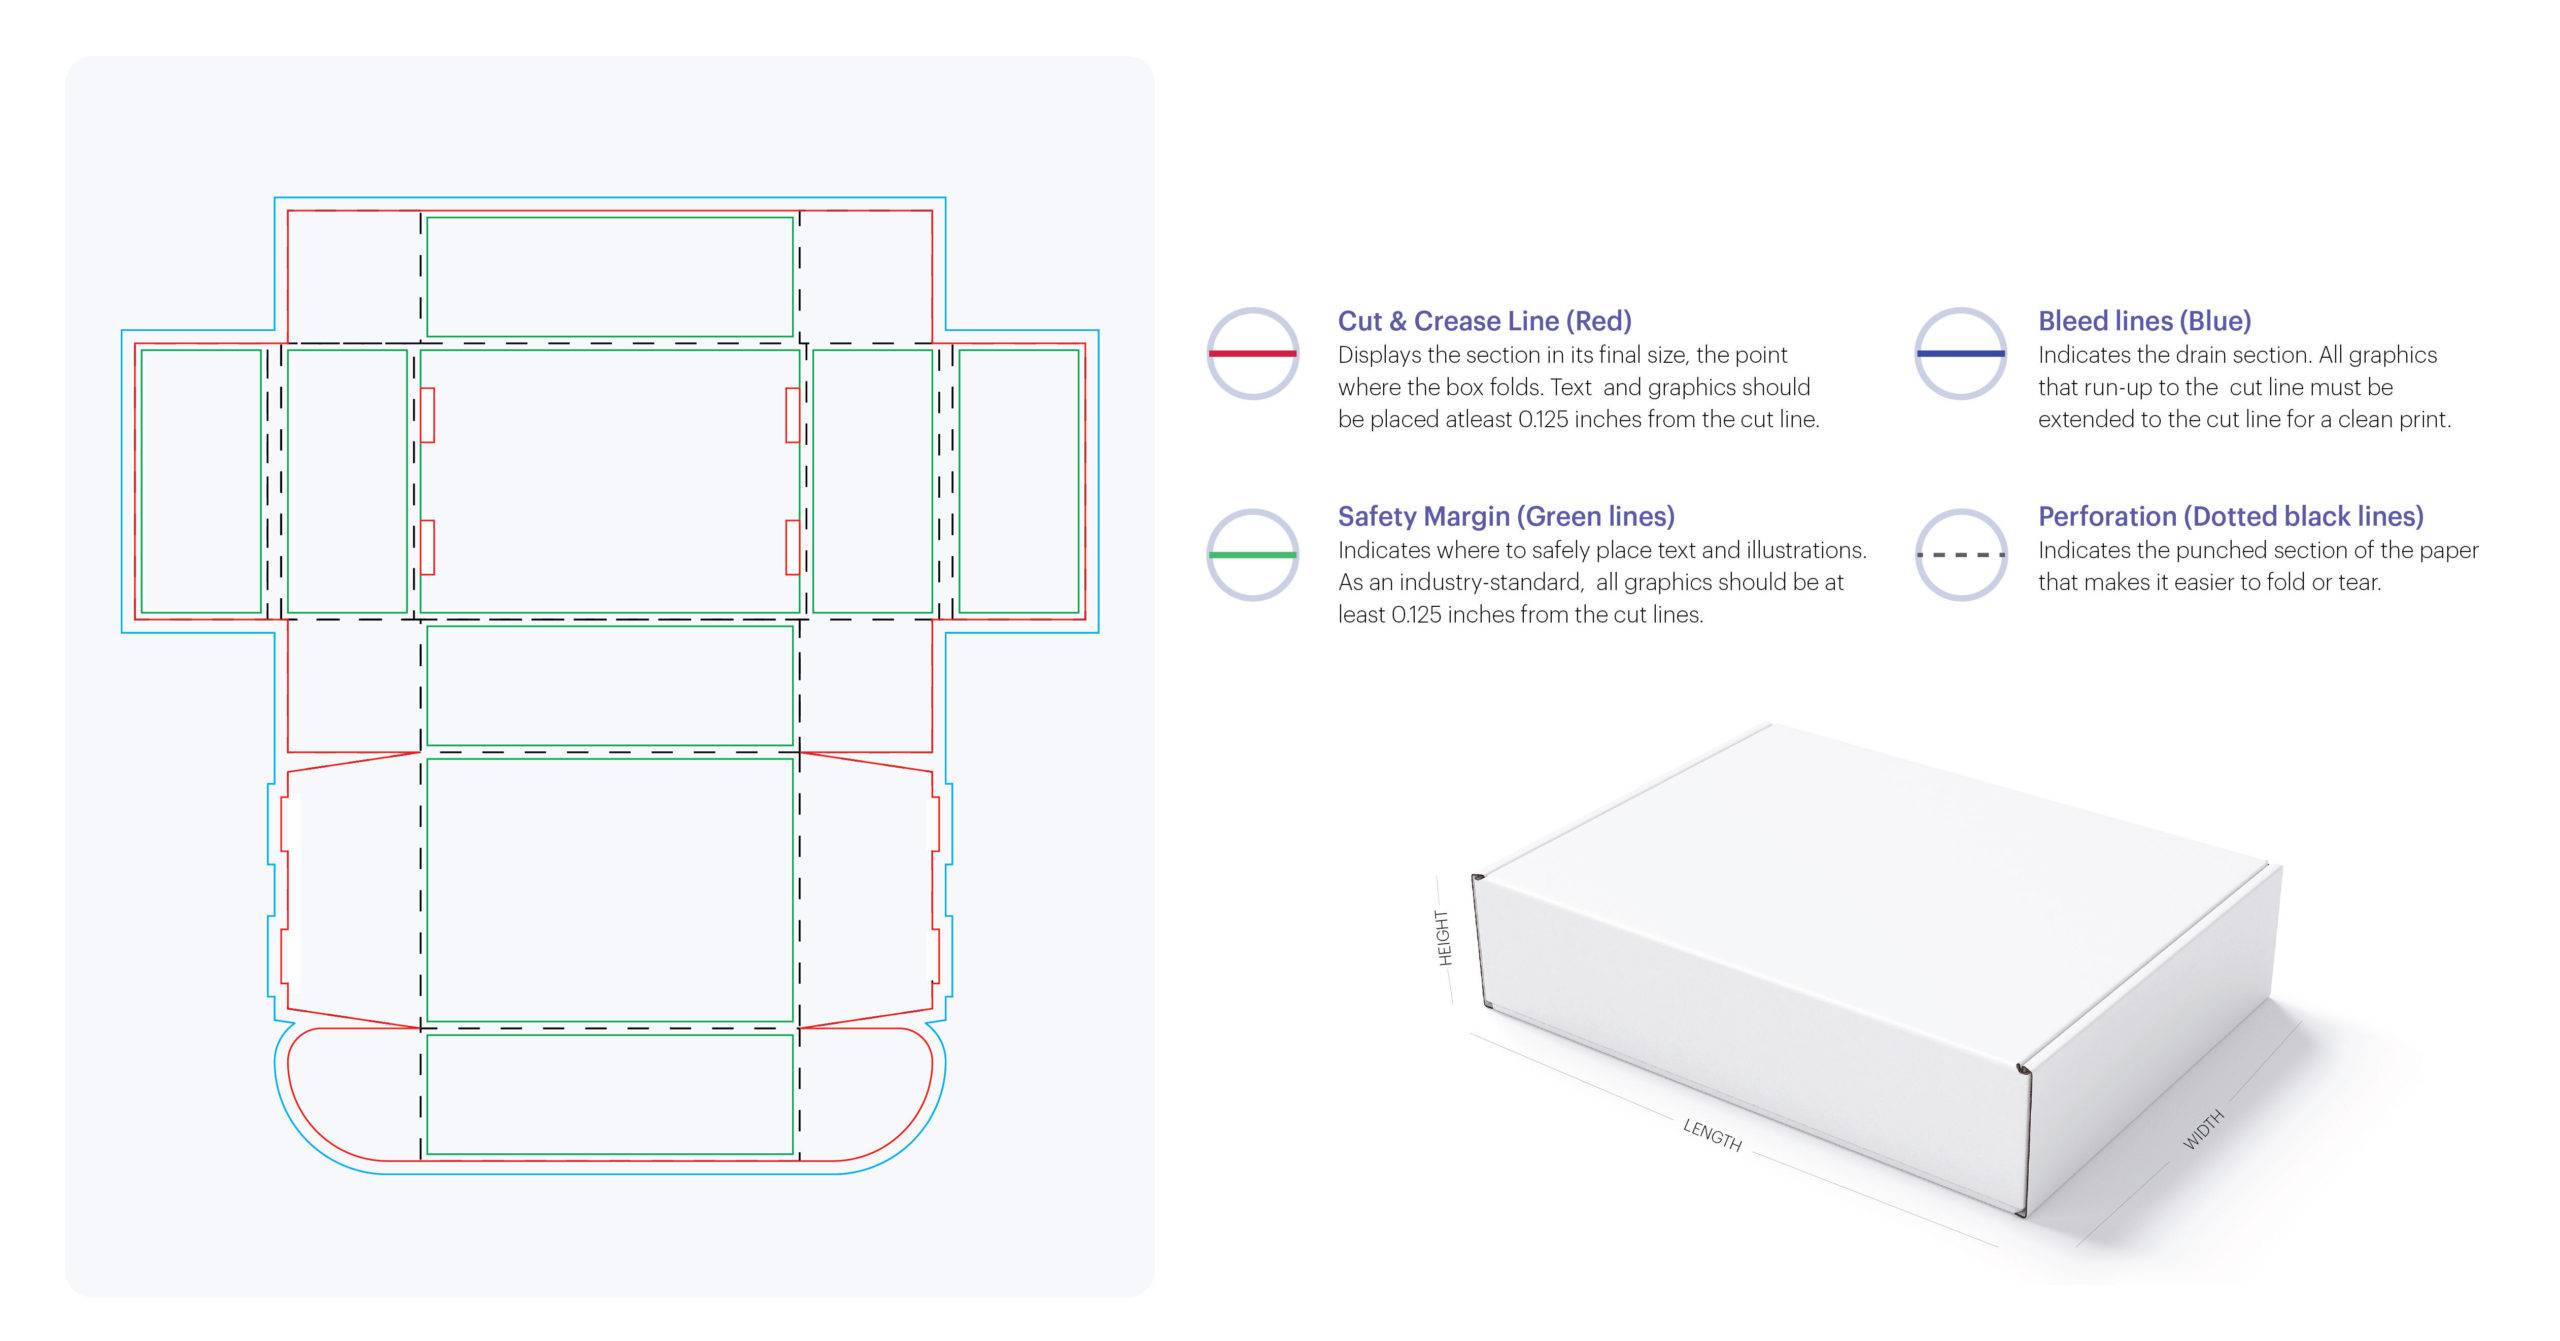
Cut & Crease Line:
This section indicates where the paper/box would fold. Visual elements such as text and graphics should be at a distance of 0.125 from the crease/cut line.
Safety Margin:
Safety margin shows where you logo and text should go. The standard size is 0.125 distance from the crease or cut line.
Bleed Line:
Often highlighted as blue, this is bleeding section that indicates the boundary up to which the graphics or visual elements should be extended.
Perforation:
This is the dotted and punched lines with millimeter size holes that allow you to easily tear the paper. This feature is mostly added to product boxes such as cereal, tissue and cosmetic boxes.
Process of Making a Dieline
Industry expert packaging designers such as the mailer box have an in-house team of people who are equipped with the knowledge of dieline. Mostly when you work with such manufacturers you need not to know about creating a correct dieline. It is the job of the designer who is working on the artwork to create a dieline. However, if you are outsourcing the design job you may need to understand how the process works.
To start with you need software tools like CAD or Adobe Illustrator to make a dieline. The designer will require working files of the artwork or design that needs to go on your package. Once the design is finalized and approved, the designer will place it on top of the flat dieline. You can work with your designer to modify the placement, colors and design. Once the artwork is positioned propery on the dieline, you can create a digital mockup of the box to see how it may look.
Some of the key factors to ensure when working on a dieline are:
- Dieline must be in the form of vector, as to accurately describe the lines
- It should be tested with a digital mockup or printed sample to catch any errors that the dieline may have
- Even a millimeter of a few cm differences can impact the output. So careful attention should be given to the specification when designing a product dieline.
RELATED BLOGS